Creating a Rotating Animated Gradient Border in SwiftUI
Borders play a crucial role in iOS app design for several reasons:
-
Visual Organization: They help separate and organize content, making interfaces easier to navigate.
-
Interactive Elements: Borders highlight tappable areas and provide visual feedback for user interactions.
-
Design Enhancement: Modern apps employ creative border styles—such as gradients and animations—to add visual interest while maintaining functionality.
In this tutorial, we’ll explore how to use SwiftUI to create a rotating animated gradient border that adds a dynamic flair to your app’s design.
# Setting Up a Simple App
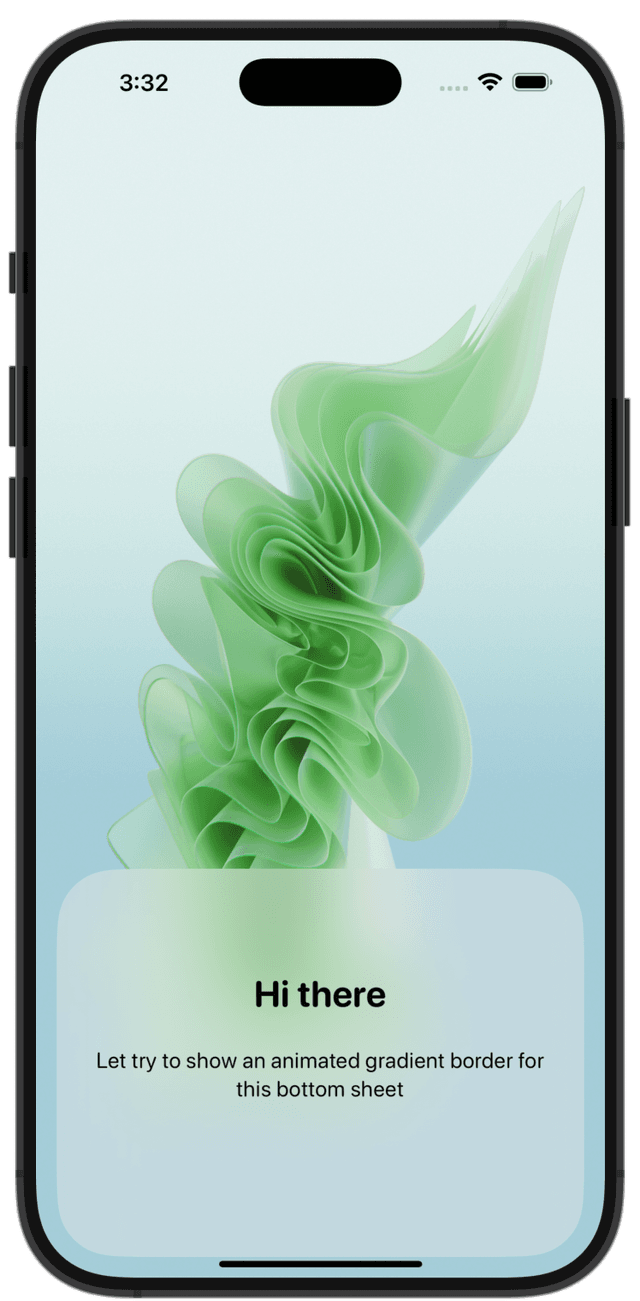
Let’s begin with a basic SwiftUI view that displays a bottom sheet over a background image. We’ll add our animated gradient border to the bottom sheet in a later step.
For this example, we’ll use a beautiful background image by Paris Bilal from Unsplash. After some minimal setup, our screen looks like this:
struct AnimatedGradientBorderView: View {

  let padding: CGFloat = 16

  var body: some View {
    ZStack {
      Image("background")
        .resizable()
      VStack {
        Spacer()
        VStack(spacing: 24) {
          Spacer()
            .frame(height: 40)
          Text("Hi there")
            .font(.title)
            .fontWeight(.bold)
          Text("Let try to show an animated gradient border for this bottom sheet")
            .frame(maxWidth: .infinity, alignment: .center)
            .multilineTextAlignment(.center)
          Spacer()
            .frame(height: 80)
        }
        .padding()
        .background(.ultraThinMaterial)
        .clipShape(
          RoundedRectangle(
            cornerRadius: UIScreen.main.displayCornerRadius - padding,
            style: .continuous
          )
        )
      }
      .padding(padding)
    }
    .ignoresSafeArea()
    .fontDesign(.rounded)
  }
}
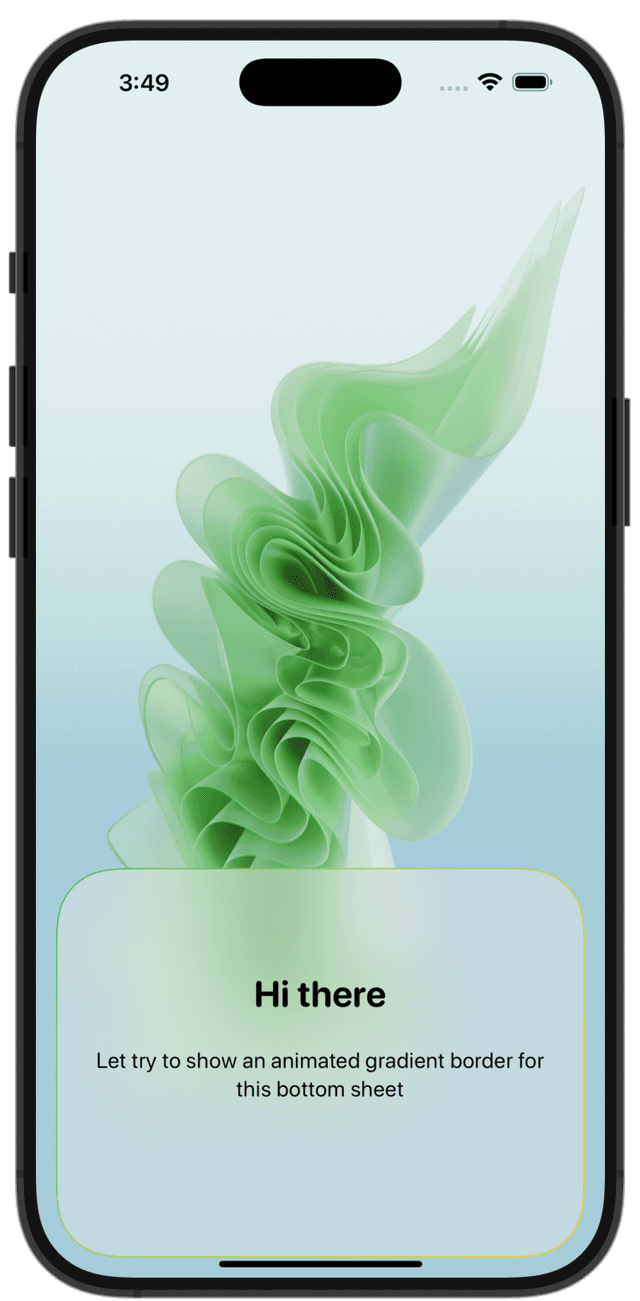
# Adding the Gradient Border
SwiftUI makes it straightforward to add a gradient border. Here’s the general approach:
- Create a
LinearGradientobject with your chosen colors. - Use
.topLeadingas thestartPointand.bottomTrailingas theendPointfor a diagonal gradient. - Apply an
overlaymodifier on the view you want to surround with the gradient. - In the overlay, use a
RoundedRectangle(or another shape) with a gradientstroke.
For instance:
let gradient = LinearGradient(
  colors: [.green, .yellow],
  startPoint: .topLeading,
  endPoint: .bottomTrailing
)

var body: some View {
  ZStack {
    // ...
    VStack {
      // ...
      VStack(spacing: 24) {
        // ...
      }
      // ...
      .overlay {
        RoundedRectangle(
          cornerRadius: UIScreen.main.displayCornerRadius - padding,
          style: .continuous
        )
        .stroke(
          gradient,
          lineWidth: 1
        )
      }
    }
    // ...
  }
  // ...
}
The above code applies a thin gradient border to our bottom sheet, resulting in a look similar to this:
# Rotating the Gradient Border
To make the gradient border rotate clockwise around the bottom sheet, we’ll animate the gradient’s startPoint and endPoint over time. Specifically, we’ll move the startPoint in a sequence:
topLeading→topTrailing→bottomTrailing→bottomLeading→ back totopLeading
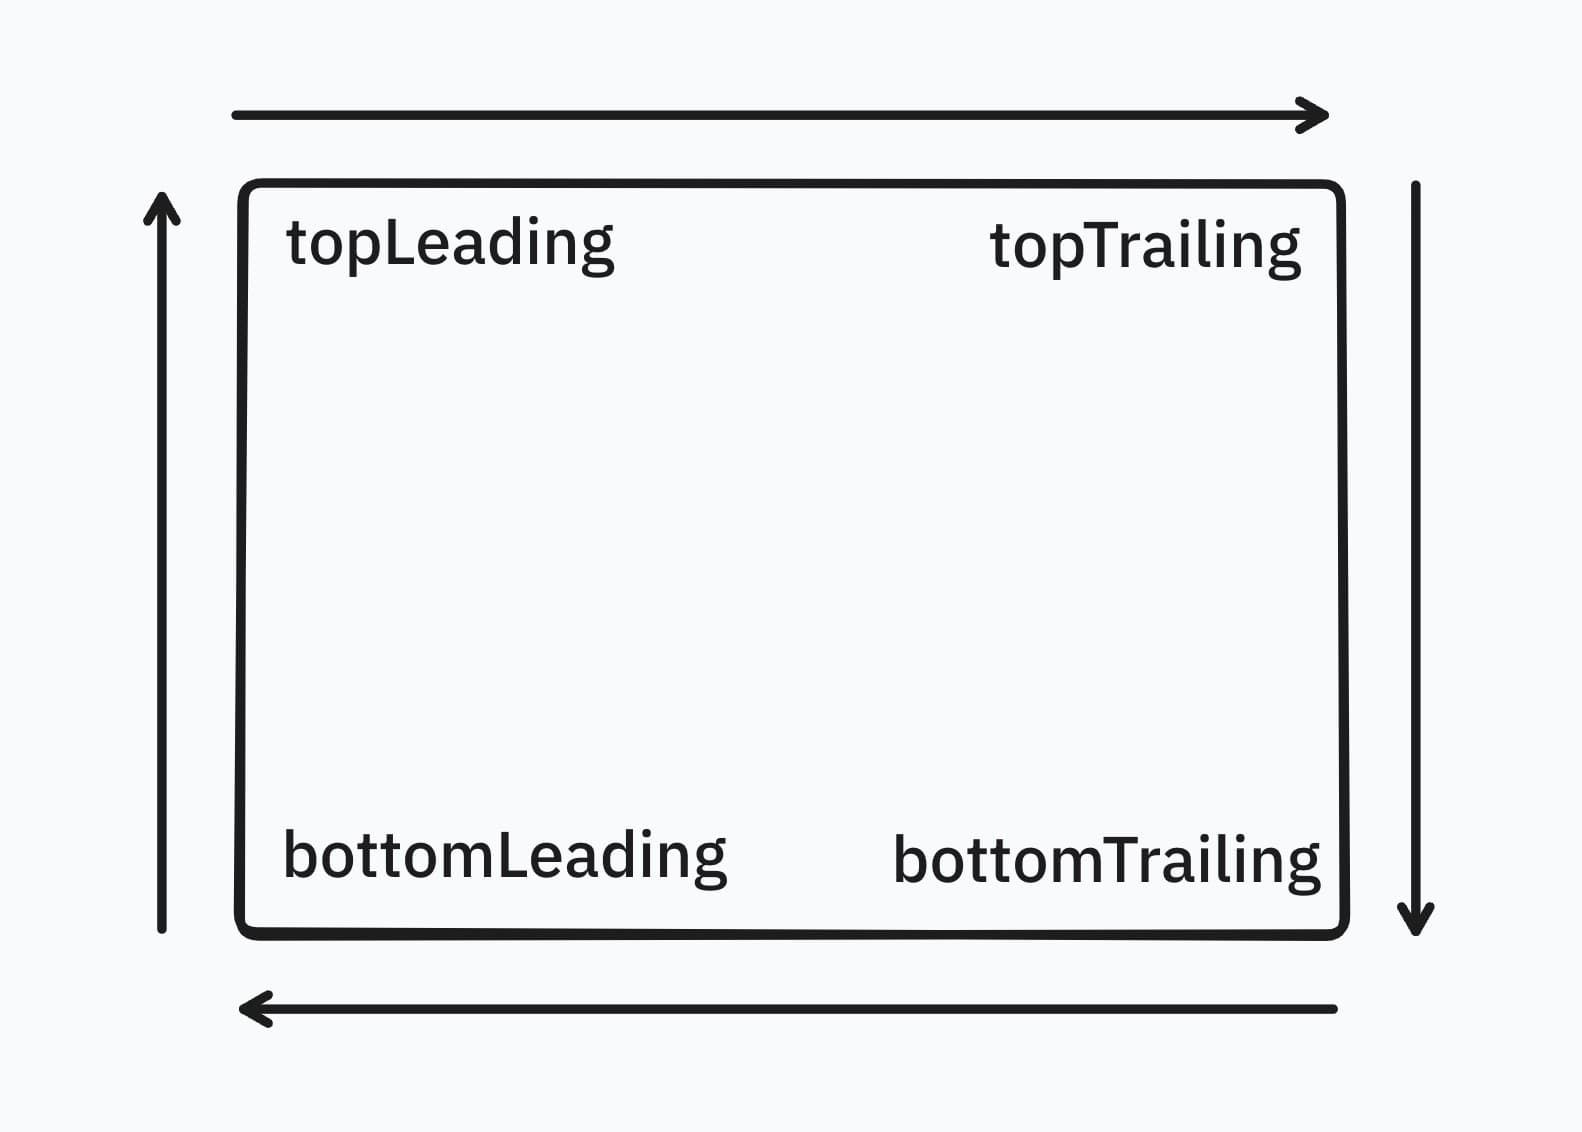
By continuously updating the startPoint and endPoint in this cycle, we create a smooth, rotating effect. One way to calculate the next point in the sequence is by applying a simple formula:
f(x, y) = (1 - y, x)
Similarly, you can compute the corresponding endPoint so that the gradient transitions in a coordinated manner. To automate these updates, you might use a Timer or SwiftUI’s animation features:
var gradient: LinearGradient {
  LinearGradient(
    colors: [.green, .yellow],
    startPoint: startPoint,
    endPoint: endPoint
  )
}

let timer = Timer.publish(every: 2, on: .main, in: .common).autoconnect()

@State private var startPoint: UnitPoint = UnitPoint(x: 0, y: 0)
@State private var endPoint: UnitPoint = UnitPoint(x: 1, y: 1)

var body: some View {
  ZStack {
    // ...
  }
  .onReceive(timer) { _ in
    withAnimation(.linear(duration: 2)) {
      let previousStartPoint = startPoint
      startPoint = UnitPoint(x: 1 - previousStartPoint.y, y: previousStartPoint.x)
      let previousEndPoint = endPoint
      endPoint = UnitPoint(x: 1 - previousEndPoint.y, y: previousEndPoint.x)
    }
  }
}
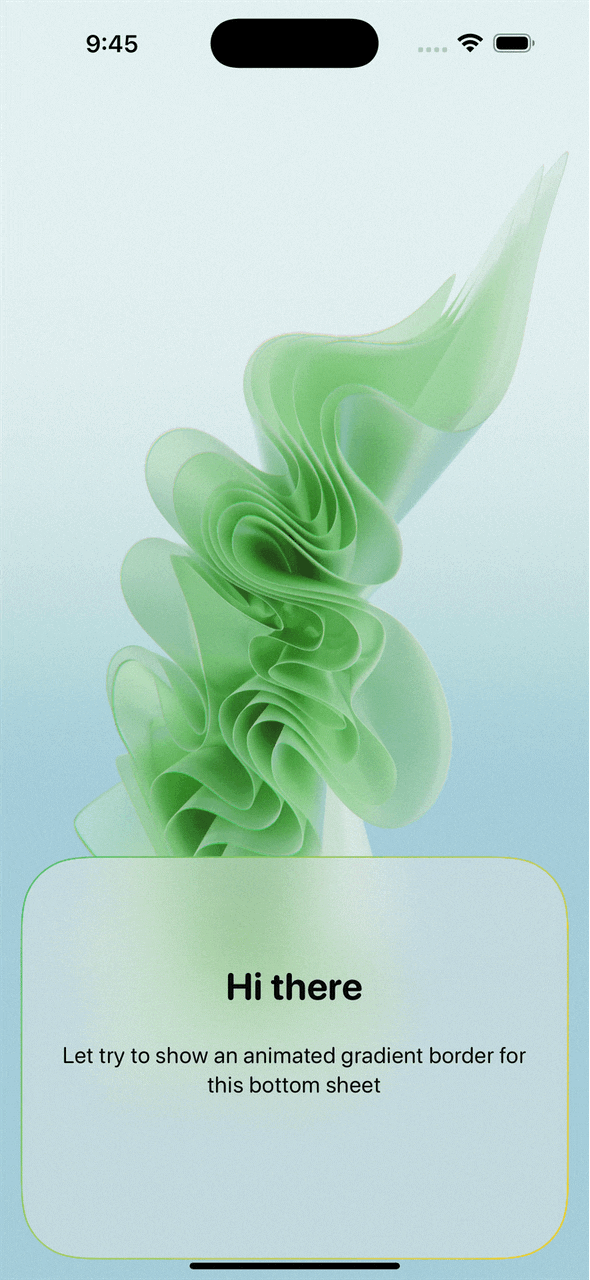
Once the animation logic is in place, the gradient border will continuously rotate around the bottom sheet, creating a dynamic, eye-catching visual:
# Final Thoughts
By combining SwiftUI’s LinearGradient, shape overlays, and simple animations, you can easily create rotating gradient borders that enhance your app’s visual appeal. Experiment with different colors, shapes, and animation timings to match your design language and branding. This technique can be applied to other UI elements, too. Try it on buttons, cards, or even entire screens to create a unified, polished look across your app.